Maskblogs

Explore our other Multimask Pages

Questions & Feedback MULTIMASK ASKBLOG
http://maskask.blogspot.com/
Community Support MULTIMASK MASKITECTURE
http://maskitect.blogspot.com/
Maskworx Photo Gallery MULTIMASK SHOWOFFS http://www.photoblog.com/showoffs

IMAGINE. CREATE. SHARE or WEAR...

Welcome to MASKS2GLOBE - your maskblog dedicated to imagining, creating, and sharing children's mask works from classrooms everywhere....

Please remember to send in your best digital mask pictures to annette@maskworx.co.nz so we can post them on SHOWOFFS; a comprehensive showcase of educational mask work!

Sunday, April 11, 2010

Make a "cartoon" character


You can “cartoonise” the human face shape of your Multimask by cutting the nose out, plaster it over and then use more plaster bandage to make whatever shape is wanted!

Tuesday, February 23, 2010

Cereal box card works great for extensions


Cereal box card has the critical weight and bendability for mask-make purposes. If the card is heavier it can't bend or be manipulated. If lighter, it doesn't hold its shape and glue in the right manner. So ask your students to bring in empty cereal boxes from home; they are just perfect for making extensions and re-shaping the Multimask starter base into storybook characters, animals & birds & bugs, etc.

To see more of the Port Chalmers mask-make project using cereal box card extensions visit http://www.photoblog.com/showoffs/2009/11/22/maskmagicalwe-are-here-maps--masks.html

Monday, October 12, 2009

Junk to Funk


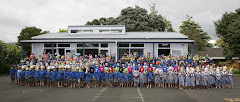
Above is a group photo of Year 1 and 2 students of Hillpark Primary School, NZ proudly wearing their insect and spider masks created as part of a wearable exhibition - The "Junk to Funk" Show - using recyclable materials like newspaper, bottle tops, magazine picture cutouts, seed pods off trees, etc. Littlies want to step into the world of make-believe and with the help of their colourful insect, critter and creature masks children are able to conquer fears, banish nightmares, make new friends, grow creative confidence, achieve success and build self-esteem. Transforming junk into funky masks is a great idea!!

Tuesday, August 11, 2009

Photographing Mask Work


An inexpensive digital camera is quite sufficient for photographing mask work although there is a knack to getting gorgeous compositional shots with great atmosphere and style and visual interest. Because the light bounces off masks in unusual ways the photographer has to master the angles exactly, get the eyes in the right position (if the mask is being worn) or get the light in the eyes (if not worn), arrange a complementary backdrop, or perhaps add a small prop to the staging, etc.

Like faces, some mask designs are just more 'photogenic' than others. Sometimes an ordinary-looking mask photographs really well, while a clever/complex mask doesn't. It's all in the lighting which brings the magic in...light is where it falls and the fact that you can never quite control it makes the photographic work artistic.

A strong collection of mask images can be posted online [or sent to masks@maskworx.co.nz for adding to the SHOWOFFS COLLECTION], or published in the form of calendars which make great Christmas presents for parents or thank-you gifts for classroom helpers.
Note: Warehouse Stationery has easy-to-use calendar-making technology.

Sunday, August 9, 2009

Voice Projection


If the students need to speak or sing in their masks, it's better if the masks are cut away from the mouth [half-masks] in order to project the voice better. Alternatively, the open or gaping mouth (as per the mask above) would do the trick. Wearing a full face mask on stage tends to muffle the voice.

Wednesday, July 22, 2009

Happy Yellow Sneetches


One clever teacher organised a band of enthusiastic parent-helpers to help make this collection of Dr. Seuss "Sneetches", then the children wore them in the Stars on Stage performance. First she sorted making a demo mask (this was done in an earlier mask making session) which was then copied by the parents. This way the masks all end up looking alike, a necessity for stage performance, and the children get to have a great time without losing any ordinary lesson time. It just makes us happy looking at this image (photo supplied by Rotary Park School, Dunedin NZ).

Tuesday, June 23, 2009

Mask Making is Tough Fun


Mask work in the classroom is not lollipop time. The Arts Team at Maskworx recommend that mask making sessions are not scheduled for last thing on Friday "when you can't get anything out of them [students] anyway". Mask work is "tough fun" - and it's been said that the best learning happens during "tough fun" - it requires certain Creative Behaviours and extreme concentration:

During mask making teachers should look for these creative behaviours; original and imaginative ideas, clever construction and technically savvy extensions, novel uses for materials found in the immediate vicinity, commitment and courage (sticking with it when the project doesn't work), seeing where the 'happy accidents' take them, stretching the boundaries of the brief (within limits), and articulate symbolic language (speaking in pictures).

We recommend teachers notice and celebrate the student's creative behaviours along the journey of mask making rather than give awards for outcomes.

Awards for Good Mask Work?

There's always the temptation in a competitive culture such as ours to give out awards for students good work. Sounds reasonable enough, but is it a good idea to appraise children's maskworks from the classroom with an adult eye? Recently a nearby country school made masks to celebrate midwinter. Many of the students were juniors. The organiser of the mask project put aside ten small trinklets as prizes. One of the parent-helpers then selected ten favourite masks by popping a red dot on the noses of the masks thought to be the best. "It was a mistake" the organiser later told us..."we then had lots of crying children".

Children aren't seeing the same thing as grownups do. To them it's not a piece of moulded cardboard with glitter on it; they're seeing a star cluster or a winter queen!! The (artistic) child sees with his/her whole mind, whilst most adults have forgotten about the wonky eye view of childhood and can only see surface details. If the child has been allowed to make the mask all by themselves, they will simply adore their own creation. They will believe their character is really real and not to receive an award can be heartbreaking. [For a happy solution see above post]

Tuesday, December 2, 2008

The Wheel of Creating

This "Turtle Mask" (made recently at Victoria Avenue School Auckland) started off so plainly, just a dark green mass. But then she gave it another "go", repainting the background colour a lighter (and better) shade of green, and then she began to explore how to show the idea of scaley skin...Our Design Director Melanie remembers flicking thru photos with her on the Internet. She always wanted to add the jewels too (even though Mel thought they weren't necessary) and they look just right! How wonderfully complete she looks...that green hair and costume so perfect, her eyes reflecting her joy in that perfection!!

Oftentimes masks struggle to be born...but try not to walk away from a mess-up. Try to turn a disaster into a something wonderful by seeing where the mess leads you. Continue because the last step on the Wheel of Creating (after nearly "losing it")...is LOVING IT!

Monday, November 17, 2008

Inside the Skin of their Characters


This is the 'Holy Grail' of mask making - kids inside the skin of their characters. These two young students who made their wise old men masks (fashioned simply from a roll of toilet tissue) have absolutely "nailed" their characterisations. You can see the kids are 'in' their masks. They are 'in' their characters. They are 'in' their stories. These kids have successfully "become the visual text". BRAVO!!

Tuesday, October 7, 2008

Multimasks as Makeup Design Tools 4 Drama

At a recent Victoria Avenue School production the Makeup Team was responsible for ensuring 150 children were appropriately made up for the Drama Performance - three nights in a row!
The special FX makeup was a particular challenge; achieving the same cohesive 'look', three nights running, using teams of novice makeup 'artists' (parents!!), while allowing for the fact that the parents on these teams could be different each night!

Mel's Solution: Use Multimasks as the base on which to create face designs, to provide a lifelike template for all to copy!


  • Apply makeup, including face paint, lipstick, eye shadow, blusher and even glitter, directly on to the Multimask face base.

  • Add handwritten notes to the Made-up Multimasks, to provide extra clarification for the special FX teams eg. "heavy brows", "blusher under glitter", etc.

  • Put together the sets of makeup required for each team...the actual coloured facepaint, the specific blusher to be used, the right lipstick and eye shadow materials, referring to the Made-up Multimask as a guide.

  • Include in these packets (Snaplock bags) the items necessary for applying the makeup: sponges, blusher brushes, eye shadow sponge-applicators, those vital lip liners and eyebrow pencils and the cotton buds and "Wet wipes" for removing mistakes!

  • Clearly label the completed packets...the team name, how many characters to be completed and to which room they are allocated.

  • Brief your teams and send them off with their complete template and tools to do the job!

  • At the end of each evening check the packet contents and replace any items, sharpen pencils, clean sponges - ready for reuse the next night!

Made-up Multimask + Complete Make-up Pack + Enthusiastic Parent Volunteers = Special FX Makeup Success!!

Wednesday, September 24, 2008

A Simple Frame for your Mask Story

To make a framed mask like this China Garden Mask you will need: 1x Coloured Multimask, 1x Bioware Oval Paper Plate, 1x set of Chinese cards, 1x Chinese Paper Cut, 2x buttons, Gold paint, Gold trim, PVA glue.

Begin by preparing your upsidedown paper plate 'frame' by painting it gold. When dry, use a glue stick to 'tack' the cards in a fan shape then PVA them into position on the gold frame. Prepare your mask by using spray adhesive to stick the paper cut design onto the face shape. PVA the mask onto the frame (place on top of the fan embellishment). Add gold trim around the rim to cover the flange. Afix button 'eyes' with hot glue gun.
(Total cost: $7 Duration Time: 1 hour)

Monday, July 28, 2008

Notes 4 Teachers on The Multimask Model of Maskmaking

A new 10 page supplement that helps teachers plan their first Classroom Maskmaking Experience is now available to download FREE http://www.maskworx.co.nz/links.html
Full of useful tips and information for educators on how to guide their students as they "Unmask their Creativity" in Mask.

Wednesday, July 23, 2008

Quick Corrugated Card Compositions

Corrugated card is inexpensive and easily attainable (from Warehouse Stationery or equivalent store), and makes a wonderful 'building material' for masks. Corrugated card can easily be cut and shaped then attached to the Multimask:
  • To make animal, bird and character masks...bunny ears, noses, scare me features, etc
  • To provide an excellent construction material for wearable art
  • To construct imaginative 'technical' elements. Corrugated card cutouts and a stapler (with a few props like bamboo skewers or dried twigs) are all your class needs for fast, effective, clean maskitecture!!

Thursday, May 22, 2008

Rotational Symmetry: from the Maskworx Magic Box

Symmetry is a way that units of pattern are organised. A pattern is symmetric if you can copy it, move it to a new location or orientation, and place it so it exactly matches the original. There are many two-dimensional symmetries but here we will examine Rotational Symmetry - using masks in repetition.
Rotational Symmetry occurs when a series of masks is rotated around a center point. The number of repeated elements can vary. In this case there are seven winter carnival masks repeated until a new image is formed which resembles a 'snowflake', a good example of rotational symmetry found in the natural world.

Mirror Symmetry: from the Maskworx Magic Box

Symmetry is a way that units of pattern are organized. A pattern is symmetric if you can copy it, move it to a new location or orientation, and place it so it exactly matches the original. There are many two-dimensional symmetries but here we will examine Mirror Symmetry - (masks and mirrors often work well together)
Mirror or reflection symmetry divides the mask design into halves that are mirror images. The axis can be located either vertically (most common) or horizontally. The human face naturally has symmetry that's why it works so well with masks! In the natural world, butterflies are a good example of mirror symmetry.


Tuesday, April 1, 2008

Learning Questions "spark" Art

The heart of making anything is trying to clear up something that is puzzling. So each creation begins with a learning question or creative question and each new mask is a product of trying to nail that question. But it is never quite resolved. The ribbon (as in the Maskworx ribbon logo) is the riddle that flows through everything...

Monday, February 4, 2008

Teacher Tip: Keeping Clean


No matter how hard you try to stop paint spilling it always seems to slop somewhere. A good tip for keeping paint, glitter and glue off students' expensive school blazers and uniforms is to ask them to bring a clean plastic rubbish bag (or keep a supply handy) for "Mask Week". Cut out the required holes, slip it over their heads and hey presto...clean kids!

Tuesday, January 29, 2008

Little Black Moretta

Did you know... Once upon a time in 16th century Venice, the highest fashion was not the little black dress, but rather the little black mask - called the Moretta ("moretta" means small & dark).
Venetian women at this time were not at all prudish and made no attempt to conceal their chests, in fact their dresses were cut so low as to strongly emphasise their cleavage. It was customary to apply makeup to colour their nipples carmine (bright red!).

As not much was left up to the imagination, the Venetian ladies wanted to create a sense of mystery by concealing everything that gives away feelings and emotions the most - the eyes and mouth. This was the aim of the Moretta. But there was one odd detail; the Moretta was held in the mouth by a button on the inside which was gripped between the teeth. The lady was absolutely mute (until she decided to respond to the advances of her audience). The reason for the button was so she could whip the mask off quickly when the game of captivation was up.

James' Art in Africa Vlog